Beyond Butt Wink: Part 2
In Part One of this series, I wanted to show some of the specific research that points to different anatomical variances in the hip and how they can affect the range of motion of the individual, as well as what these ranges of motion could mean in terms of injury risk and possible performance benefits or detriments. In today’s post I wanted to show a few ways you could assess yourself to determine what shape and orientation your hips were in and from there what movements or positions would be best suited for your individual movement characteristics.
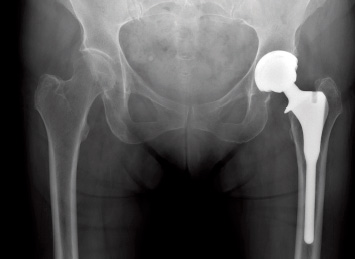
It should be noted that these assessments are very subjective and open to the interpretation of the individual doing them. If you’re not sure of what you’re feeling or seeing, it would be wise to get assessed by someone who actually knows what they’re doing in terms of looking for this kind of stuff, and also who could give you an idea of what your outcomes should be. As with any manual assessment, self or guided, there’s a degree of error built in, and the only real gold standard would be to get multiple X-rays of your hip from different planes (usually saggital and frontal would suffice) to see the shape and orientation of your hips. Barring the availability of an X-ray machine for this versus figuring out who has broken bones and needs surgery, manual is the easiest and most cost efficient method possible, but don’t hang your livelihood on it being the end-all-be-all.
Supine Assessment
To get an idea of the shape and relative range of motion of the hip socket, you could use a supine assessment where you move the femur through a range of motion and track the positions where the pelvis starts to roll without any further movement at the hip joint itself. Essentially, you’re moving the hip into a point where you create bone to bone restrictions and further movement can’t be accomplished at that joint. Here’s a great example of a professional assessment on the hip looking at it’s available range. The specific assessments I’m talking about starts around the 2:40 mark.
To do the self-assessment, this video shows the first step in the supine position where you can see how the hip moves through the flexion range of motion.
An assessment like this is a bit more sensitive to pressure than trying to pull to end range, so be very aware of where the end of the range of motion occurs before pulling the hip off the floor. Because the floor is supporting the individual and the arm is guiding the leg, the involvement of muscle contractions to limit range of motion should be minimal, but as with any self assessment there’s going to be some tension in that sucker. A guided manual assessment would be a better option, but this will do in a pinch.
Half Kneeling Assessment
Where the supine assessment can look at the hip and its available range in flexion, extension should also be a consideration. The half kneeling assessment looks at extension one side at a time, and also whether the range is influenced by muscle tension that could restrict extension. This is best done with a mirror to view the relative angle of the hip by looking at how the thigh and torso line up. Neutral means a straight line. If you can get the thigh behind the torso without looking like your low back is arching to make the range of motion occur, you’ve got some good extension.
So now you’ve seen the hip moving through both flexion range of motion and extension and have a decent idea of what should be possible. The good thing about passive tests like these is they give you a lot of information about the structure without involving confounding variables like tension, guarding, muscle length, or stability requirements.

Thomas Test: Only slightly looking at hip flexor length on this test.
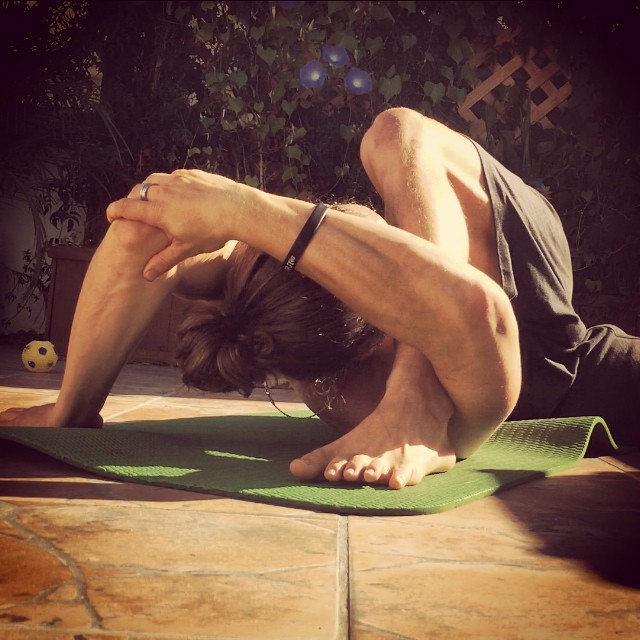
Next up comes a bit more movement but still in a controlled environment. Instead of trying to squat from a standing position with the influences of gravity, balance, strength, fear and other fun stuff like that which could all independently limit range of motion, we’ll give it a go from an all-fours position with a simple rock back. From this position, the spine is now not supported on the ground, so it’s free to move around as required, which is a good indicator of when the hips run out of range of motion. This rockback is expertly demonstrated by Tony Gentilcore.
Placing the feet againt a wall puts the ankles into dorsiflexion, which means the triple flexion of a squat pattern (ankles, knees and hips) is simulated quite effectively. The rockback goes as far as possible before the low back starts to round. At this point, it would be best if you had a mirror handy to see that point for yourself, or have a friend watch your low back and tell you when it goes from being straight and not moving to the point where it starts to flex. Bonus points if you can sit on your heels and then maintain your back position while stretching your arms out and lowering your head further as Tony did, which makes this now an overhead squat assessment.
So let’s say you try the rockback and get almost no where past 90 degrees of hip flexion before your low back starts rounding. What now? Try opening your knees a couple of inches wider and trying it again. Maybe depending on what happened on your supine assessment you have more flexion range of motion with slightly abducted hips, and a wider stance gives you a lot more room to play.
If that worked, cool, you just need to mimic that stance when you squat to dip it low and limit the chances of having any impingement issues. If it didn’t work, you could try going even wider, but if that doesn’t work you might have found your anatomical limit to how much flexion you’re going to get.
This is a concept I stole from Dr. Stu McGill, who picked it up from Dr. Shirley Sahrmann, and I’ve repurposed it here. The concept is so simple it’s brilliant. Here’s the doc in action demonstrating the test for the specific components to look for.
Some individuals, no matter how much they try, don’t have the hip range of motion to get to full depth during their squat patterns, and in the case of powerlifters may be chasing white lights for their entire career due to not getting the depth on the platform. This could also be due to deeper hip sockets, thicker femoral necks, retroverted femoral necks, or any combination of these factors. Then again, some people might not have to worry about that at all.

Because of this wide range of genetic dispositions to specific ranges of motion, joint ranges of motion in relation to a population “average” should always be taken with a grain of salt. What would be considered average for one may be considered excessive for another, and still yet optimal for someone else. As a result, I would encourage more specific comparisons to ranges of motion required for certain activities the individual wishes to participate in and determining if there are any deficits versus comparing the individual to arbitrary numbers established for “health.”
With these tests we just looked at what we could see through movements, and unfortunately we can’t tell what the specific alignments should be, but then again we probably don’t need to if we know what the range of motion the individual can operate within is and how they use it.
So to break down the findings of the test:
Anteverted acetabulum (more forward alignment)
- Big flexion angle achieved before rounding of the pelvis.
- may not be with knee vertical over the hip, but could likely come at a bit of an angle outside of vertical.
- Curved path could be elliptical socket, with a prime mobility zone in the middle. Going wider doesn’t provide any further flexion.
- potentially limited hip extension test.
- Rockback test is deeper than 90 degrees at the hip, and possibly as far as sitting on the heels.
Retroverted acetabulum (more posterior alignment)
- Flexion is limited. The path could be very horizontal once the max hip flexion is reached, meaning abduction doesn’t produce more flexion.
- Angled path could still be present, but flexion mobility is still not close to having the knee in the chest.
- Extension range is past neutral.
- Rockback test is limited, usually to 90 degrees or just past.
Deep socket and/or thick femoral neck, or degeneration
- Flexion Range of motion is limited in all directions. There could be a angled placement to allow more flexion or a flat positioning, but the range is still limited.
- limited extension
- limited rockback
Shallow socket, thin neck, lateral placement
- near max range of motion in flexion, with a near full flexion line with knees close to neutral versus abducted out.
- hip extension past neutral, occasionally beyond 20 degrees
- rockback test to heels
- Could be considered hypermobile
So now that you have an idea of what kind of hip structure you have, let’s put together the pieces and figure out what kinds of activities will work well for you and what ones may need some modifications. That will be for Part 3 next day.
14 Responses to Beyond Butt Wink: Part 2